Grow a Bean in a Bag!
A Fun Seed Germination Experiment for Kids Ages 5–9
Have you ever wondered what happens to a seed when it begins to grow?
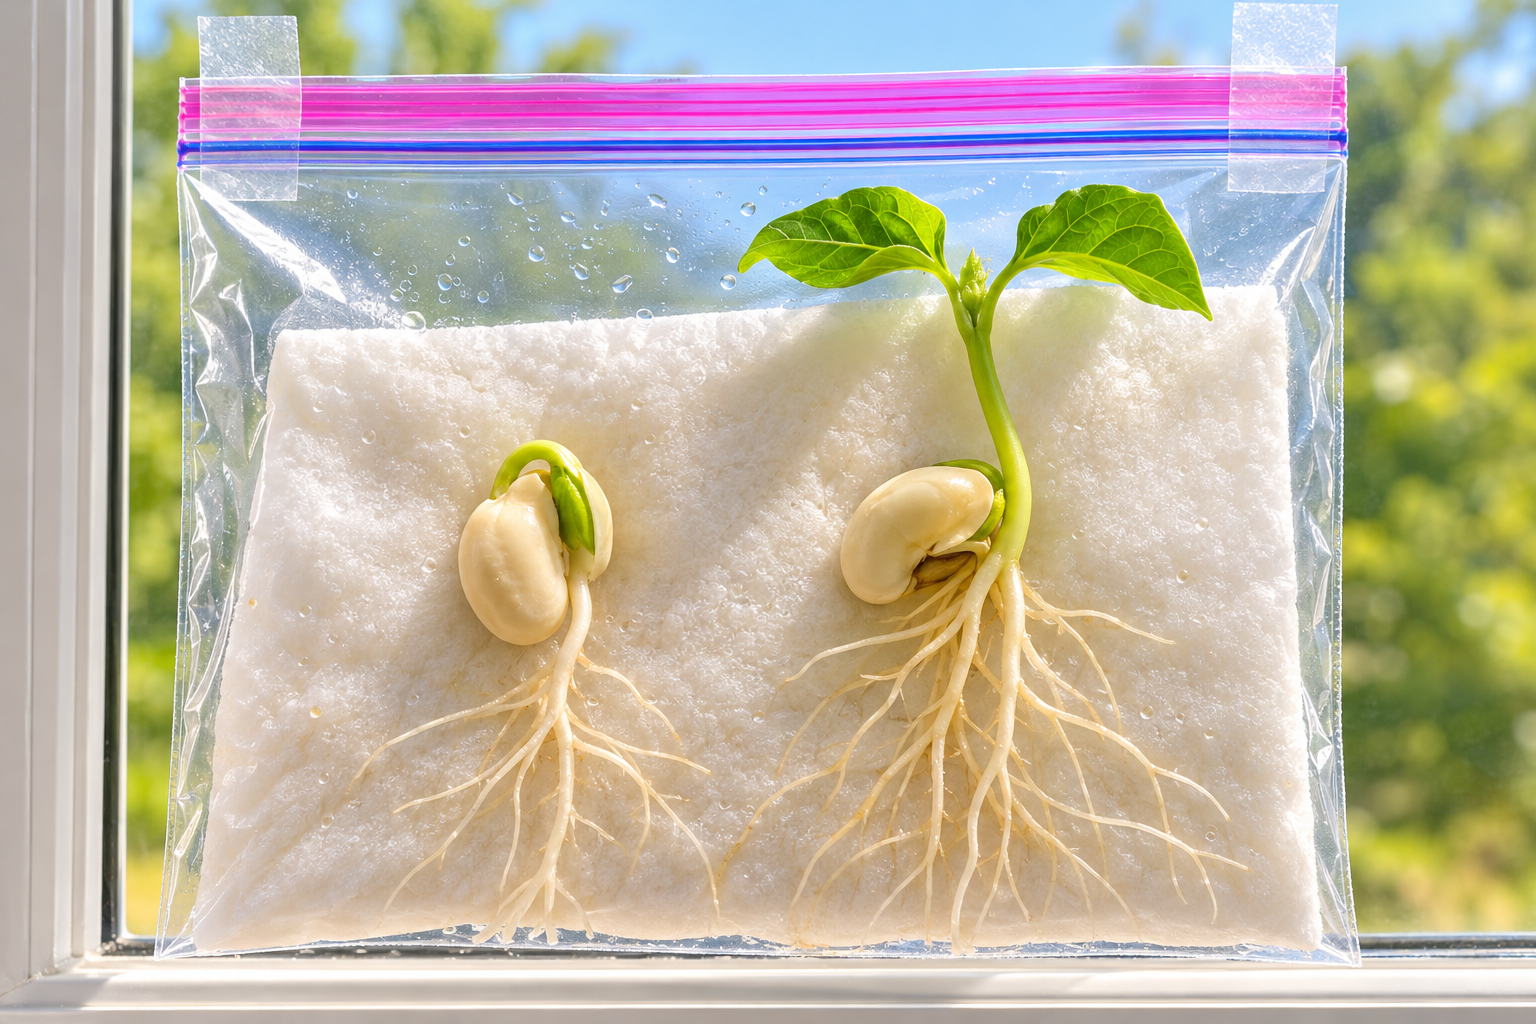
In this fun, hands-on science experiment, you'll become a plant scientist! Using just a bean, a paper towel, water, and a clear plastic bag, you can watch a tiny seed begin its amazing journey into a growing plant.
You'll see the first roots appear, watch a little stem emerge, and discover how a seed develops into a young plant.
Best of all, you can observe these exciting changes day by day without digging in the dirt!
Are you ready to grow your own bean plant? Let's get started!
What You'll Need
You only need a few simple materials to watch a bean begin to grow!
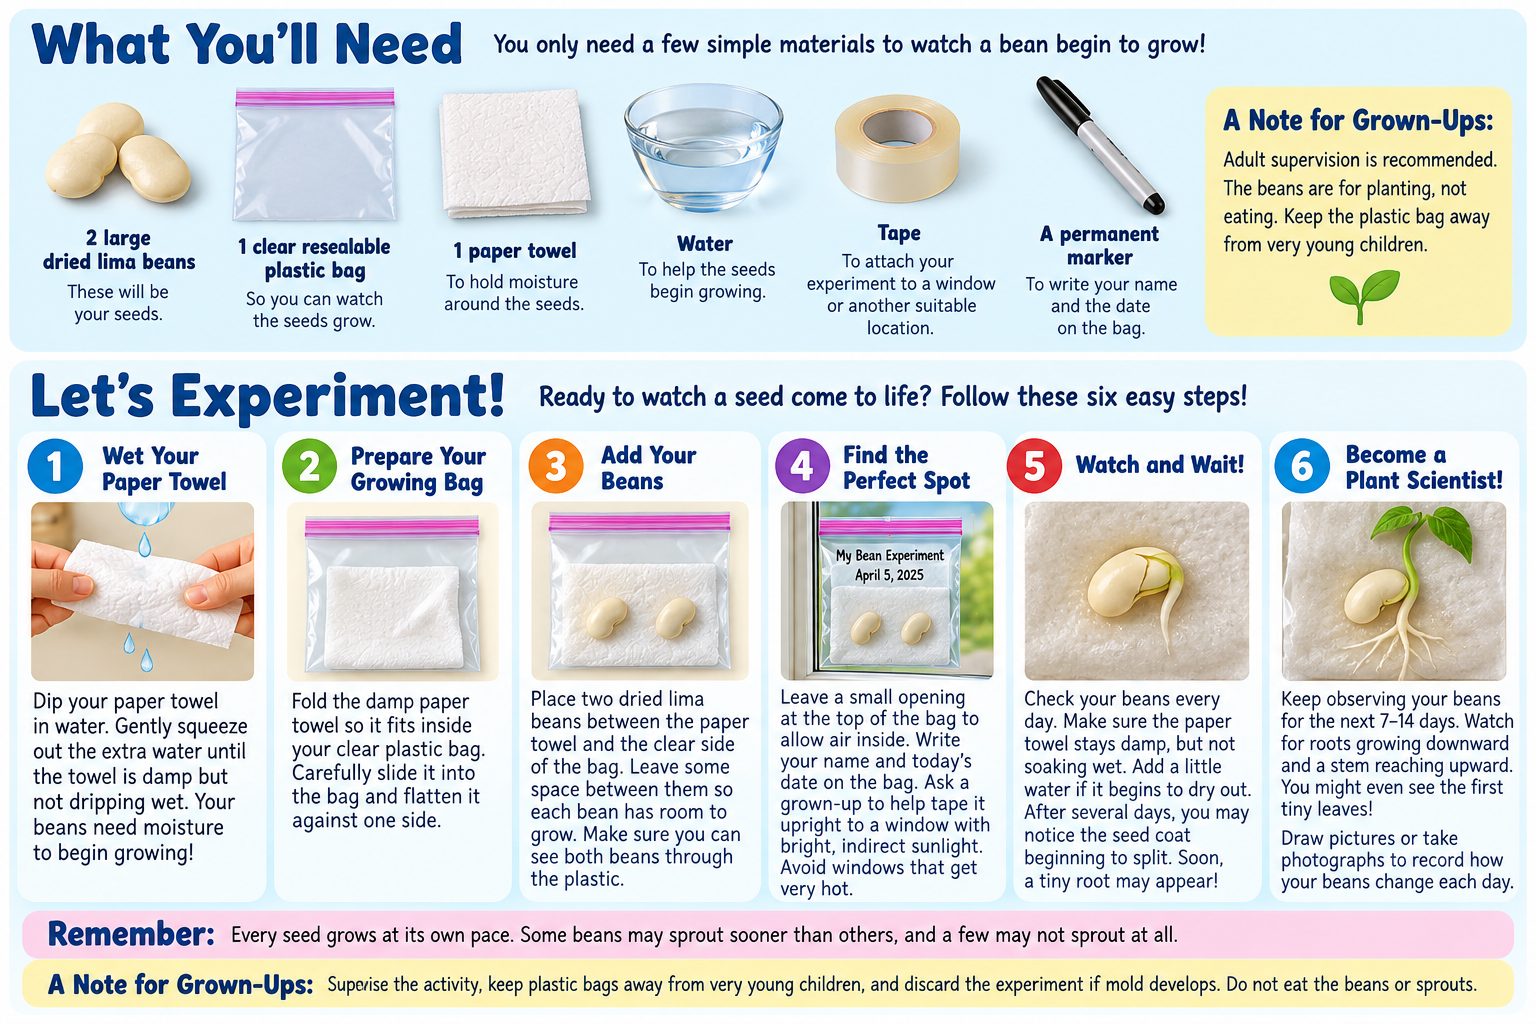
2 large dried lima beans — These will be your seeds.
1 clear resealable plastic bag — So you can watch the seeds grow.
1 paper towel — To hold moisture around the seeds.
Water — To help the seeds begin growing.
Tape — To attach your experiment to a window or another suitable location.
A permanent marker — To write your name and the date on the bag.
A Note for Grown-Ups: Adult supervision is recommended. The beans are for planting, not eating. Keep the plastic bag away from very young children.
Let's Experiment!
Ready to watch a seed come to life? Follow these six easy steps!
Step 1: Wet Your Paper Towel
Dip your paper towel in water. Gently squeeze out the extra water until the towel is damp but not dripping wet. Your beans need moisture to begin growing!
Step 2: Prepare Your Growing Bag
Fold the damp paper towel so it fits inside your clear plastic bag. Carefully slide it into the bag and flatten it against one side.
Step 3: Add Your Beans
Place two dried lima beans between the paper towel and the clear side of the bag. Leave some space between them so each bean has room to grow. Make sure you can see both beans through the plastic.
Step 4: Find the Perfect Spot
Leave a small opening at the top of the bag to allow air inside. Write your name and today's date on the bag. Ask a grown-up to help tape it upright to a window with bright, indirect sunlight. Avoid windows that get very hot.
Step 5: Watch and Wait!
Check your beans every day. Make sure the paper towel stays damp, but not soaking wet. Add a little water if it begins to dry out.
After several days, you may notice the seed coat beginning to split. Soon, a tiny root may appear!
Step 6: Become a Plant Scientist!
Keep observing your beans for the next 7–14 days. Watch for roots growing downward and a stem reaching upward. You might even see the first tiny leaves!
Draw pictures or take photographs to record how your beans change each day.
Remember: Every seed grows at its own pace. Some beans may sprout sooner than others, and a few may not sprout at all.
A Note for Grown-Ups: Supervise the activity, keep plastic bags away from very young children, and discard the experiment if mold develops. Do not eat the beans or sprouts.
Think Like a Scientist!
Great scientists ask questions, make predictions, and carefully observe what happens. Now it's your turn!
As your beans begin to grow, think about these questions:
1. Which Bean Will Sprout First?
You planted two beans. Do you think they will begin growing on the same day? Make a prediction and see what happens!
2. What Happens First?
Will you see a root, a stem, or a leaf appear first? Watch your beans carefully and record what you discover.
3. Which Way Do the Roots Grow?
Look closely at the tiny roots. Are they growing upward, downward, or sideways? What about the stems?
4. How Do Your Beans Change Each Day?
What differences can you see between Day 1, Day 3, Day 5, and Day 7? Draw pictures or take photographs to record the changes.
5. Do Both Beans Grow the Same Way?
Compare your two beans. Do they grow at the same speed? Are their roots and stems the same size?
Ready for More Science Adventures?
Did you enjoy watching your bean sprout and grow? There's so much more to discover about the amazing world of seeds and plants!
Continue your scientific adventures with Hands-On Science Activities and Experiments for Kids: Fun With Seeds by Tom Wilding.
Packed with engaging, hands-on activities and experiments, this book encourages young scientists to investigate seeds, explore how plants grow, make predictions, and discover the wonders of nature.
Perfect for curious children ages 5–9, as well as parents, grandparents, homeschoolers, and elementary teachers who want to make science learning fun!.
Why Does It Work?
How does a tiny bean turn into a growing plant?
Every bean seed contains a tiny baby plant waiting for the right conditions to begin growing. This process is called germination.
When you place your bean against a damp paper towel, it begins absorbing water. The water helps wake up the tiny plant inside the seed.
As the bean absorbs water, its outer covering, called the seed coat, softens and may split open.
The first part to appear is usually a tiny root. The root grows downward and begins absorbing water.
Next, a little shoot grows upward. Eventually, the shoot develops leaves.
At first, the baby plant uses food stored inside the bean to help it grow. Once its green leaves develop, the plant can use sunlight to make its own food through a process called photosynthesis.
Your bean also needs oxygen and a suitable temperature to germinate.
Amazing Science Fact!
A bean doesn't need soil to begin germinating! It can start growing with water, oxygen, and the right temperature. However, as the plant gets bigger, it will need more room, nutrients, and a suitable growing environment to stay healthy.
Now you're a plant scientist! You've watched one of nature's most amazing transformations: a tiny seed becoming a growing plant.
Try This!
Create a Bean Growth Diary!
Each day, record the date, draw what your beans look like, and write one sentence describing what has changed.
Remember: Scientists don't always know what will happen. That's why they investigate, observe, and keep records!